
Dataset
Manage task data uploaded to storage in the dataset file system and assign tasks to project participants.
Dataset file system
Method to display folders.
In the dataset, all folders which are uploaded to the storage are not displayed as a tree structure. However, they are displayed in a full list in the path form.
For instance, when folder A and folder B which is under folder A are uploaded, the list of folders in the dataset will be expressed as follows.
- /A folder
- /A folder/ B folder
Also, if you upload only a single file, a root folder will be created automatically.
Task file method
The formation of a task file consists of a single file or a scene file depending on the project type.
Scene files can be converted through the Manage Scene Files function in the storage menu.
- Single file : Single Image, Segmentation, Video, Text
- Scene file : Sequence Image, 3D Point Cloud
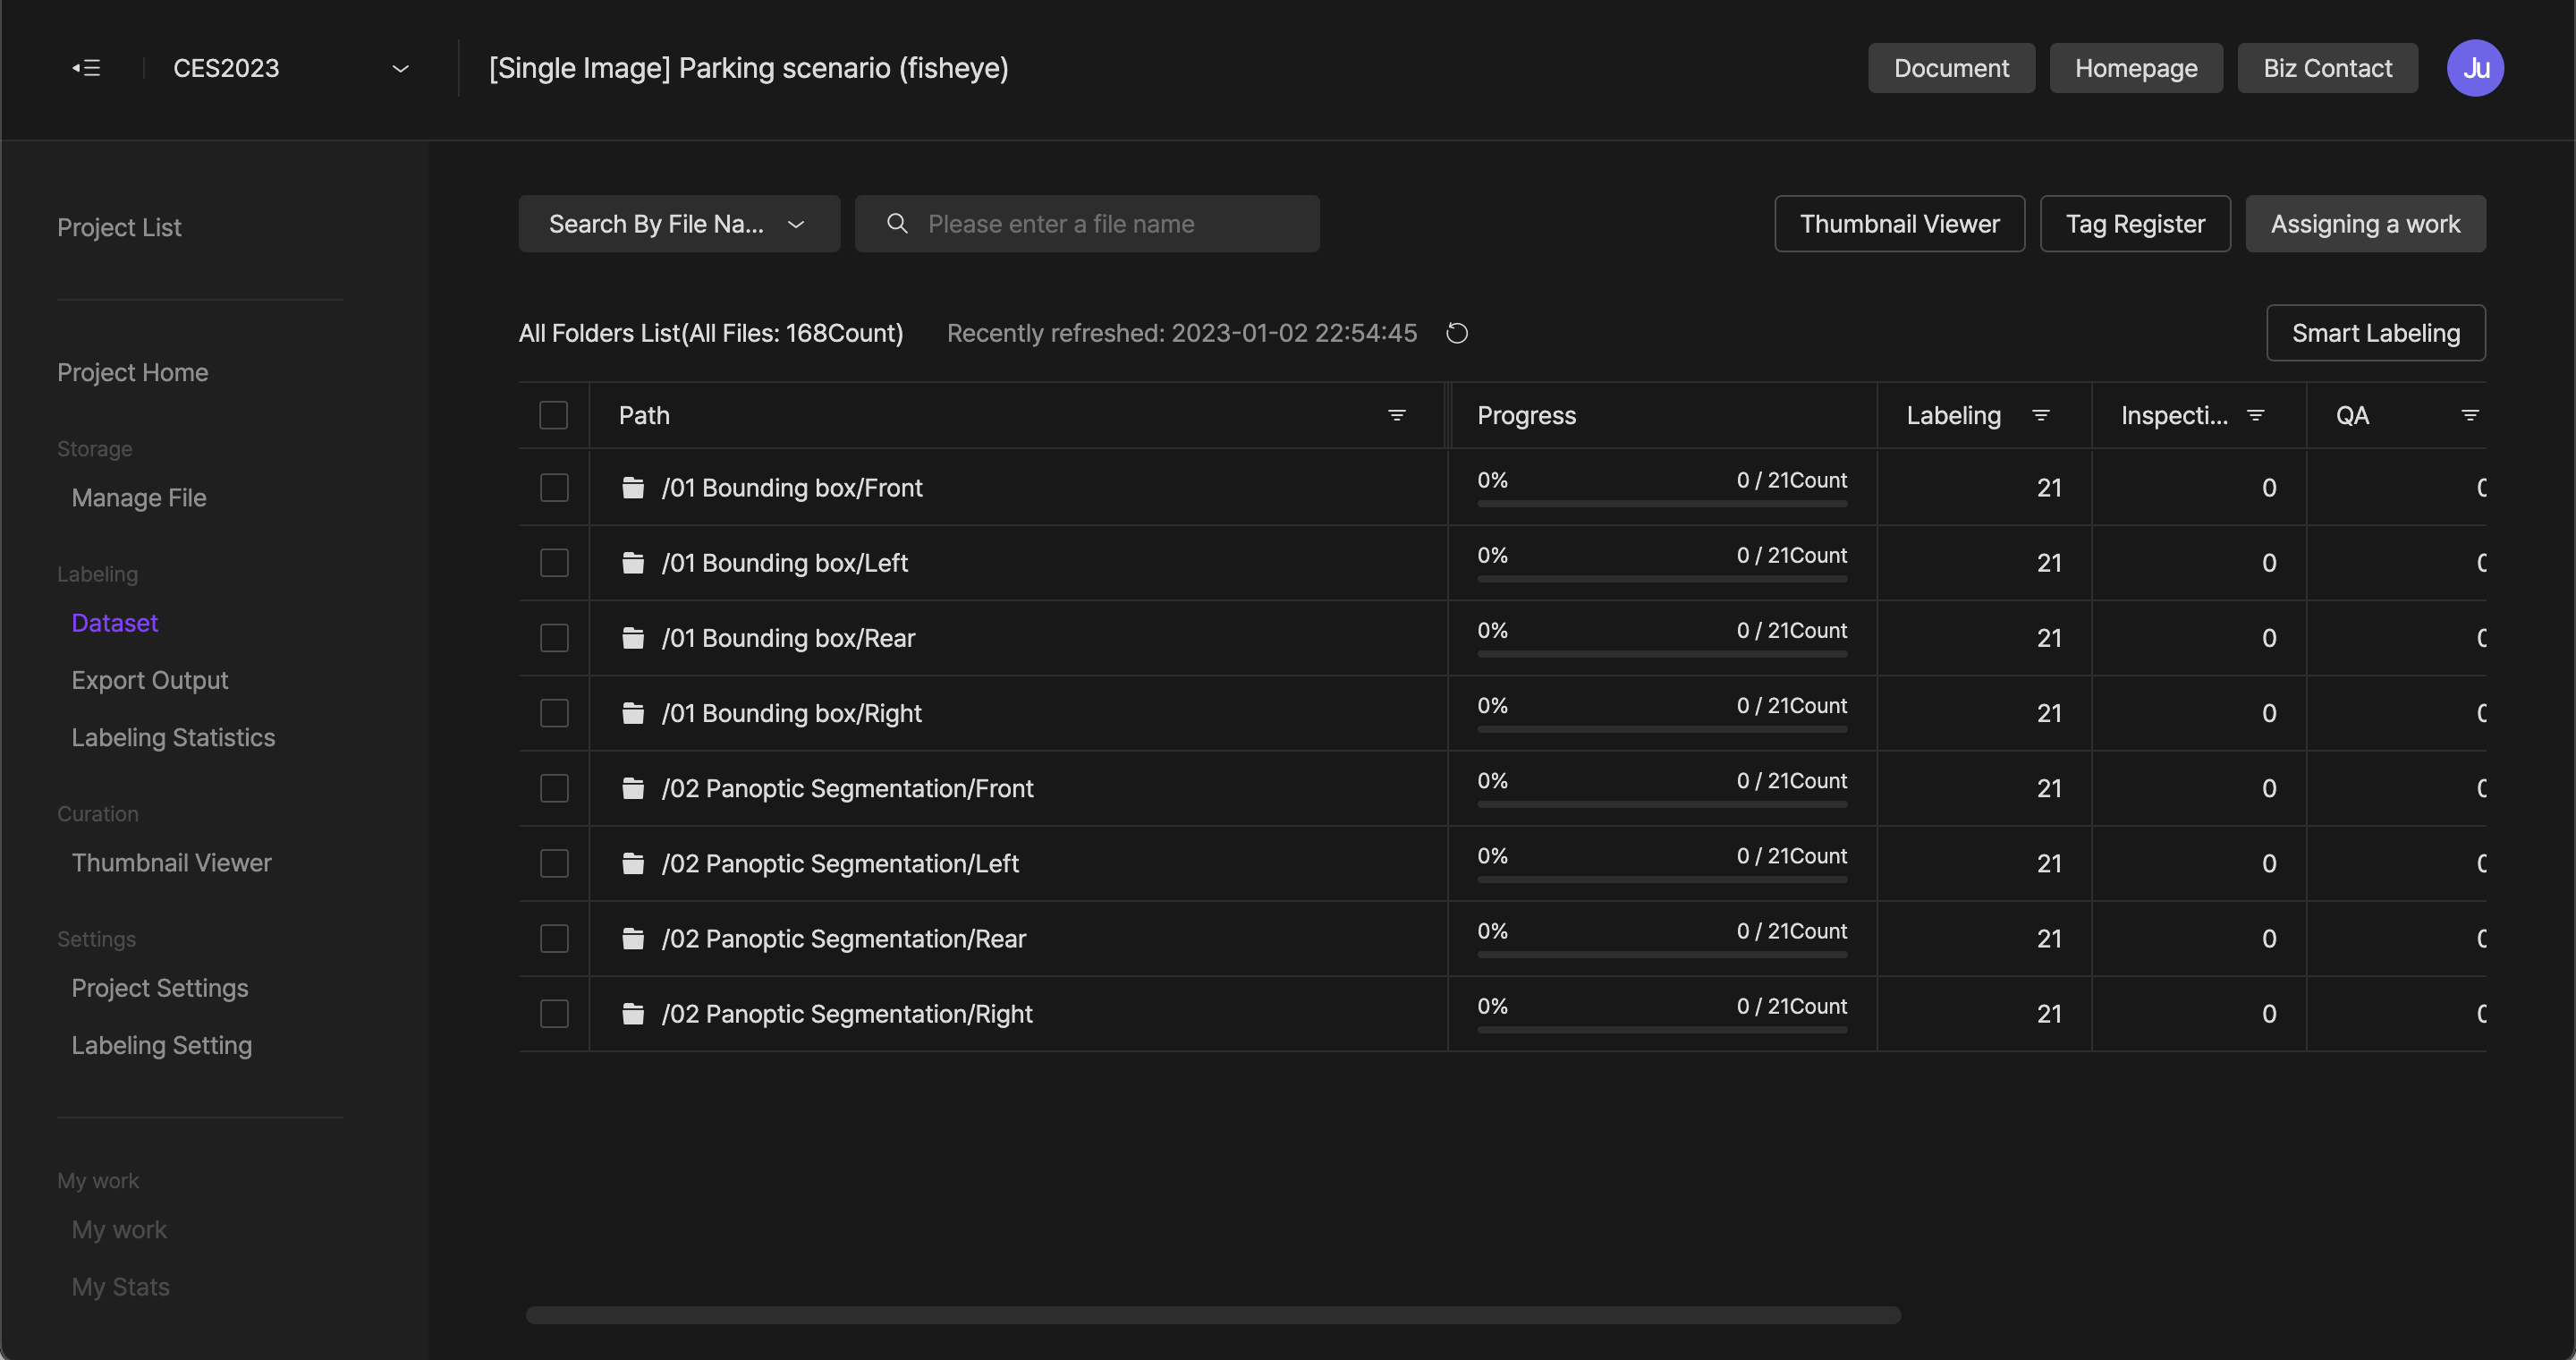
Full folder list
This is the first screen you can see when accessing the dataset menu. The uploaded folders are listed in the folder list, and you can check each folder's file information and progress status.
Folder list information
Path
it is the path and folder name of the uploaded folder.
If there are other folders under the folder, all the folders including the lowest-level folder will be spread and listed in the form of a path.
Progress rate (scene file completion rate)
Indicates the progress rate of tasks in the folder and displays the number of completed files counted. It is displayed as 'Scene File Completion Rate' for project types that scene files are used.
Task stage name
It displays the name of each task stage and the number of files before or progressing in the task stage.
Auto-allocation (applies only to a single file)
You can set whether to assign automatically and prioritize. When a worker requests to add data, files are allocated from the folder where automatic allocation is set.
It is not displayed for project types that use scene files.
- Unapplied: Do not apply the Auto-allocation. If all folders are unapplied, it is not available to request additional data.
- Top/Middle/Low: Allocate the files of the folder in top-middle-low order.
Tag
Tags can be registered for each folder or file, and by using this, they can be used for filters.
Extract
You can proceed with extraction with the folder selected in product management.
Wizard window function
If you select the folder check box, you can apply settings to multiple folders through the wizard window.
- GT initialization :
it is the function that initializes all GTs created within the selected folder. Stage 1 (Labeling) Operates on unworked files. - Automatic allocation :
You can set the same auto-allocation priority to selected folders. It is not displayed for the project types that use scene files. - Tag settings :
Set the same tag to the selected folder. - Forced completion :
Force to change all files in the folder to complete the stage. The task stage and status are available to select.
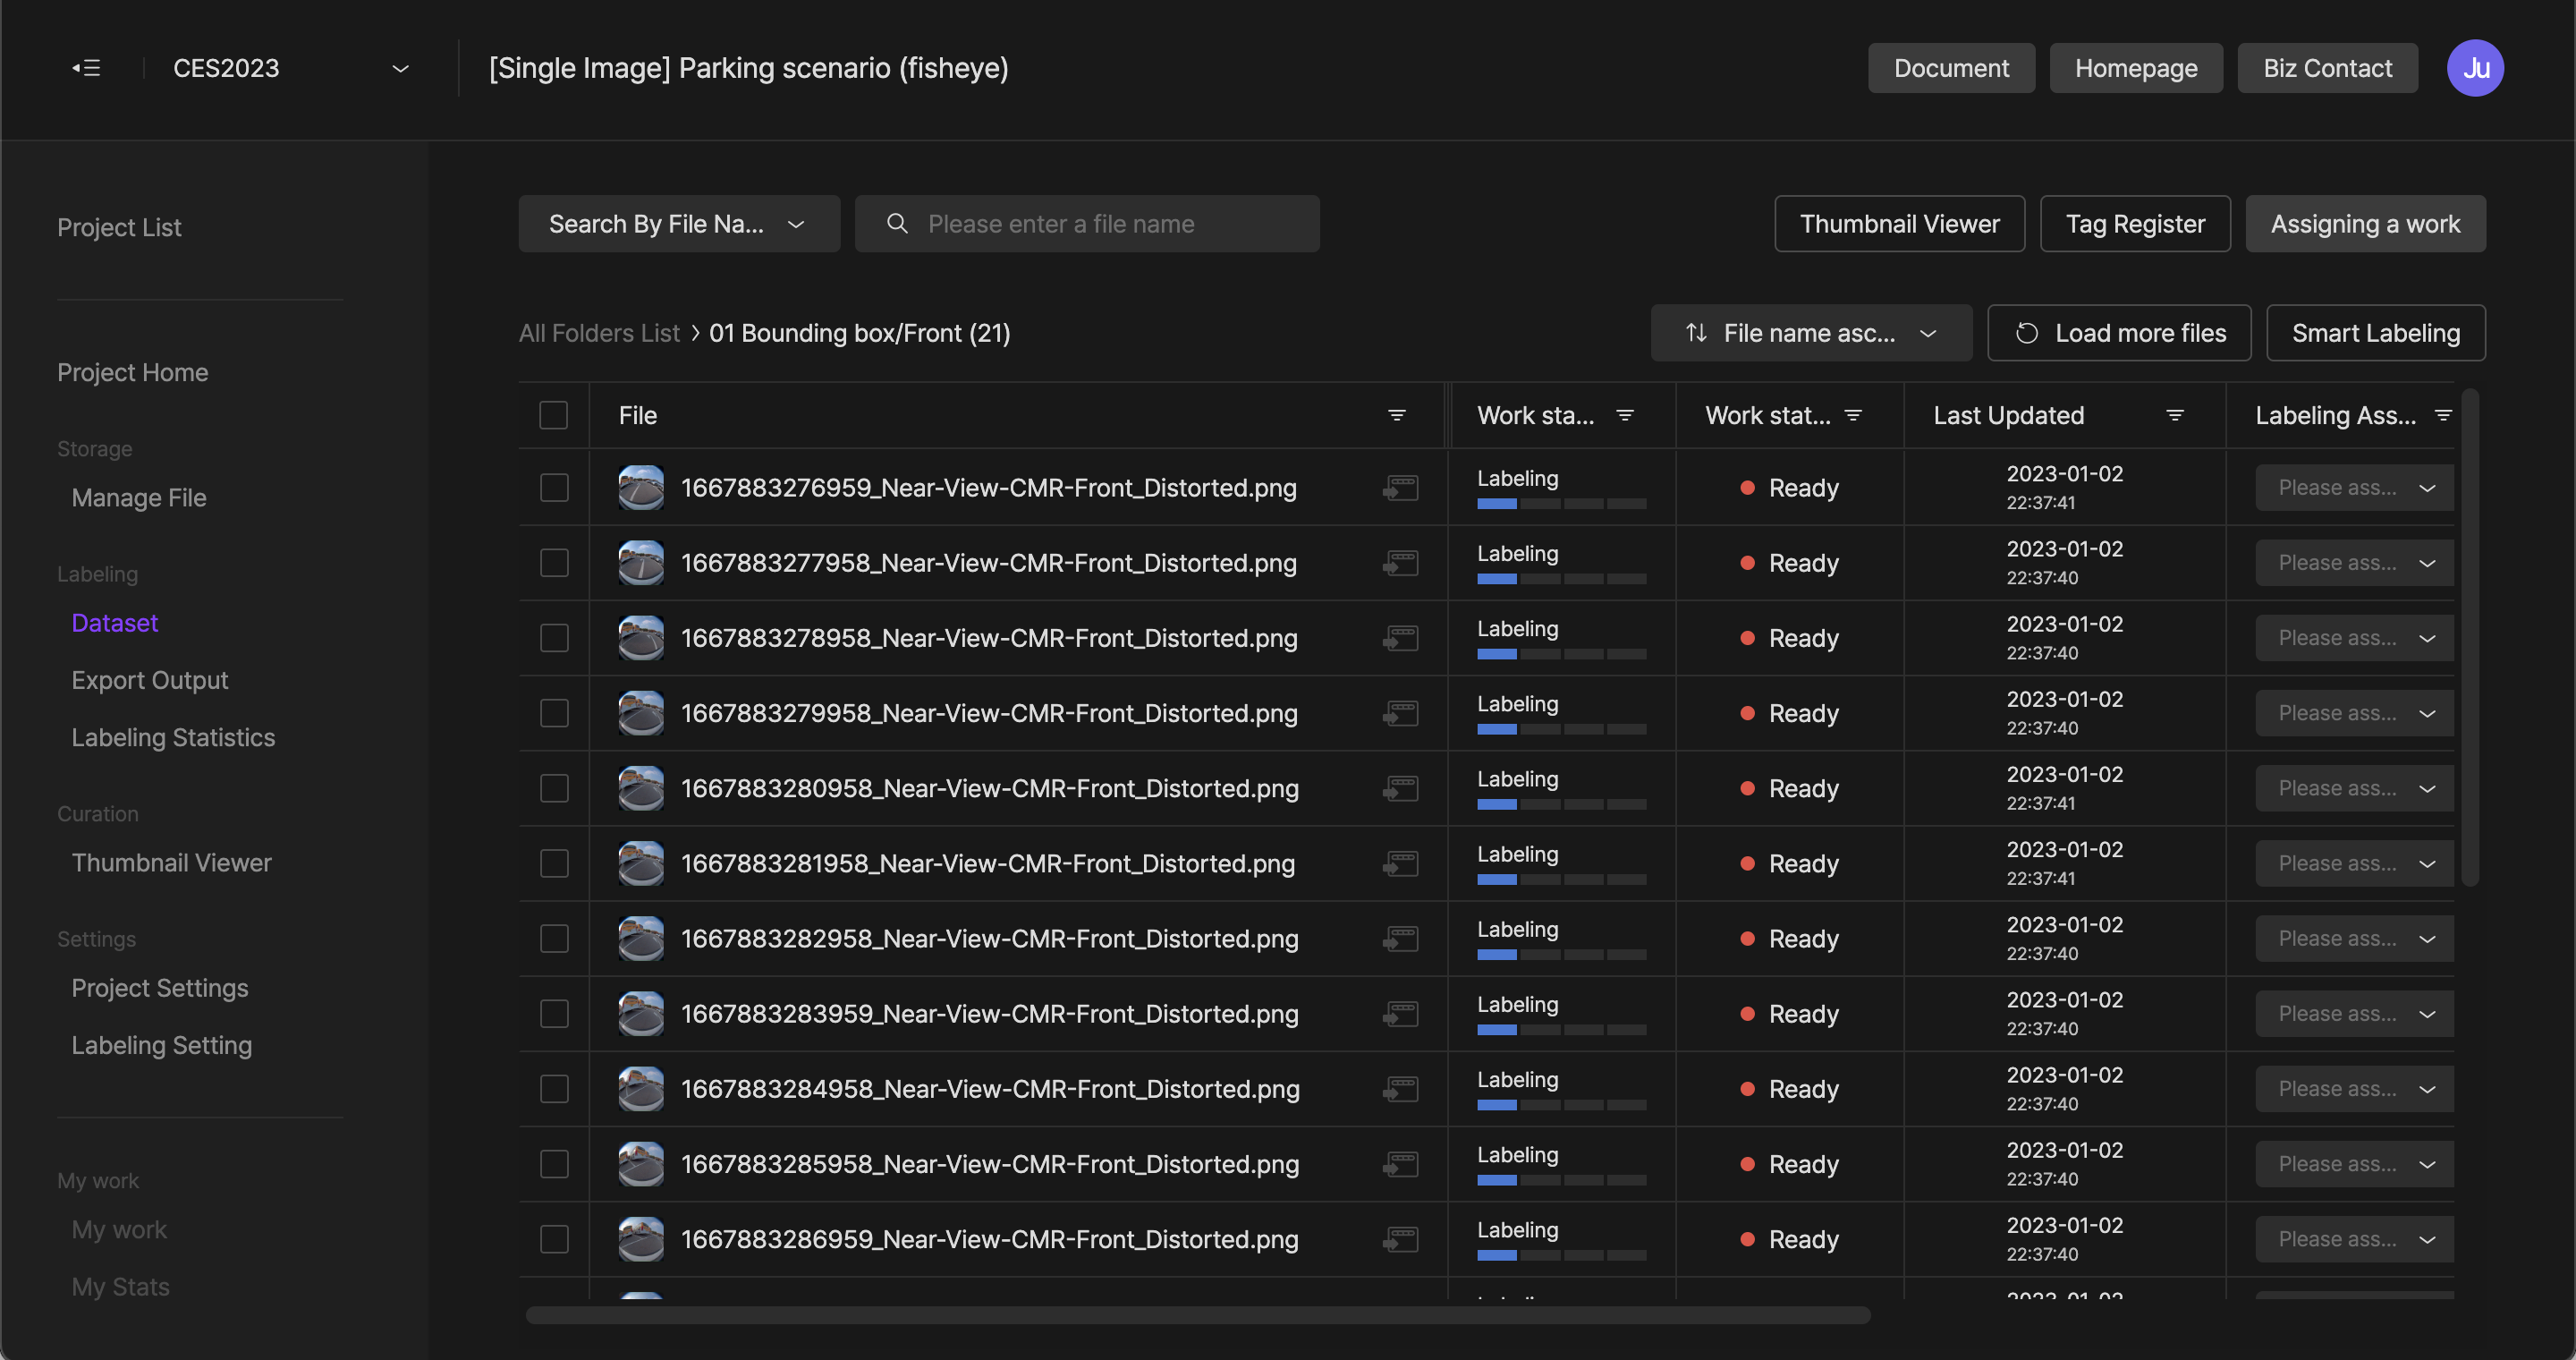
File list information
File
The name of the uploaded file within the folder.
You can check the QFV (Quick File View: labeling data preview) function by clicking on the file name.
If you select the 'Open Studio' button to the right of the file name, you can open that file in 'Studio'.
Task stage
The current task stage of the file.
The task stage is displayed in the labeling settings.
Task status
The current task status of the file.
- Unworked: It is the status before the manager in the task stage starts work.
- Proceeding: This is the status that the task manager in the task stage has entered the studio and started the task. It is not displayed for project types that use scene files.
Last update
The date and time that the last file's data was updated.
They are not displayed for project types that use scene files.
Progress status of Frame
It indicates the task progress rate of the scene file, and the number of completed frames in the scene file is counted and displayed.
It is not visible for the single file using-project types.
The number of track IDs
The number of track IDs created in the scene file is displayed.
It is not displayed for the single file using-project types.
Manager of the task stage
This is the information about the manager of each task stage. If there is no manager, it is provided blank.
You can directly assign a manager for each stage by selecting an item.
Load more files
Loads an additional 100 file lists. The file lists are loaded 100 at a time, and even if you scroll down, additional files are loaded.
Wizard window function
If you select the file check box, you can apply settings to multiple files through the wizard window.
- GT initialization
: This function initializes all GTs created in the selected file. Stage 1 (Labeling) Operates on unworked files. - Reset a stage
: You can change the task stage of the selected files into the previous state. The task status of the changed files is changed to Unworking. - Bulk rejection
: The selected files are rejected collectively to the previous step. It is inactivated when the task stage is not the same as the files selected together. - Setting a manager
: Assign selected files directly to a specific manager. - Tag settings
: Set the same tag to selected files. - Forced completion
: Forces to change selected files to complete. You can select the task stage and status.
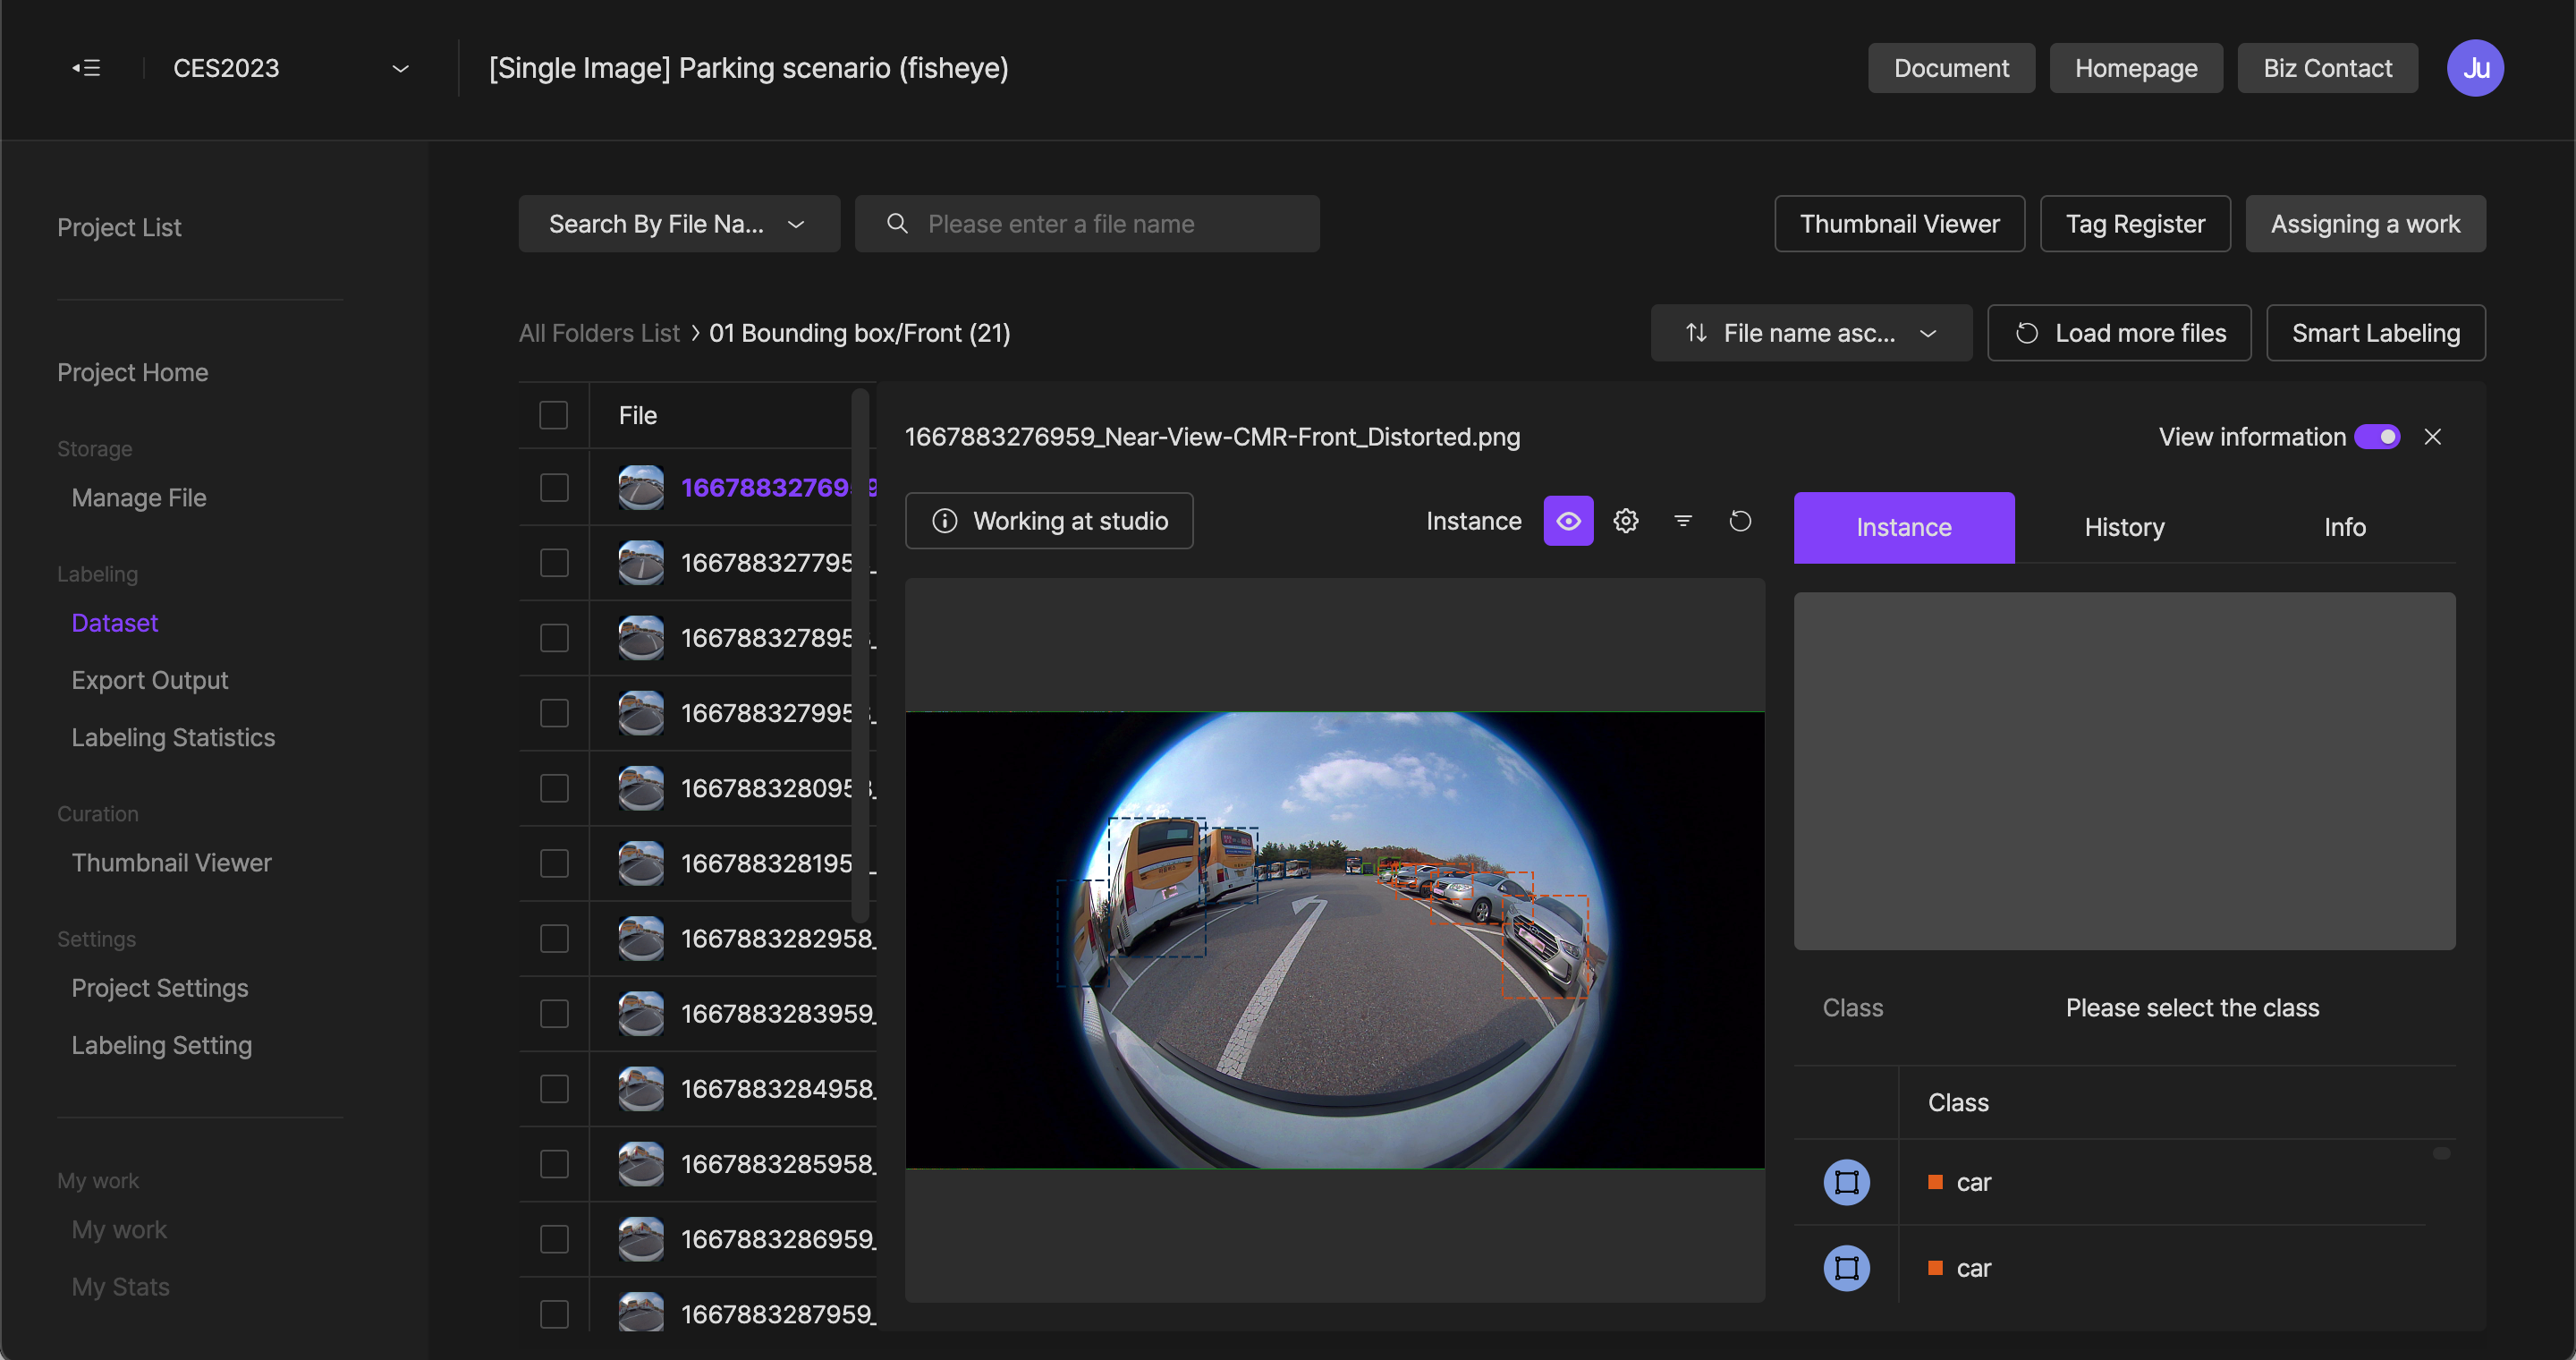
Quick File View (QFV)
Without entering the studio, it loads a preview window so that it is available to quickly check the labeling data and details of a file
- Working in a studio
: Check the selected file in the studio. - Setting Views
: You can set the visualization of instance thumbnails. - Hiding instance
It
: is available to turn the instance area display on and off. - Settings
- Color information by each class
- View class
- View Attribute
- (Key point) Viewpoint labels
- (Key point) Viewpoint order only
- (Key point OD) Viewpoint labels
- (Key point OD) Viewpoint order only
- (Poly segmentation) View masking
- (Poly segmentation) Set masking opacity
- (Poly segmentation) Hide the source
- Filter
: By filtering task types, classes, and attributes, you can check only the instances you want. - View information
- Instance
: Check the instance and classification information worked on the file. If you select an instance history or thumbnail, you can check the thumbnail, class, and attribute information of the instance. - History
: You can check the manager of the file, stage, and changes of the tasks. - Q&A
: You can ask questions about instances/files through Studio's Ask a Question mode. - info
: You can check the detailed information in the file. File type, file location, size, upload date, file size, and tag information are displayed.
- Instance
Tag function
By using the tag function, you can efficiently classify massive datasets, and when extracting products, you can quickly extract only the data you want. Tags applied to folders are not automatically applied to files.
Add tags
- Click a tagged cell in the Datasets list.
- In the tag edit modal, click the add tag button.
- Write the tag name to be added within 15 characters and press the enter key.
Apply tags
- In the list of datasets, click the tag cell of the target to which you want to apply the tag.
- Click the checkbox of the tag name that you want to apply.
- Click the ‘Apply’ button.
Upload tags in bulk
By selecting the 'Upload tags' of your dataset, it is available to register tags in bulk.
After entering the contents according to the instructions that can be found in CSV file, it is available to upload the CSV file and apply it in batches.

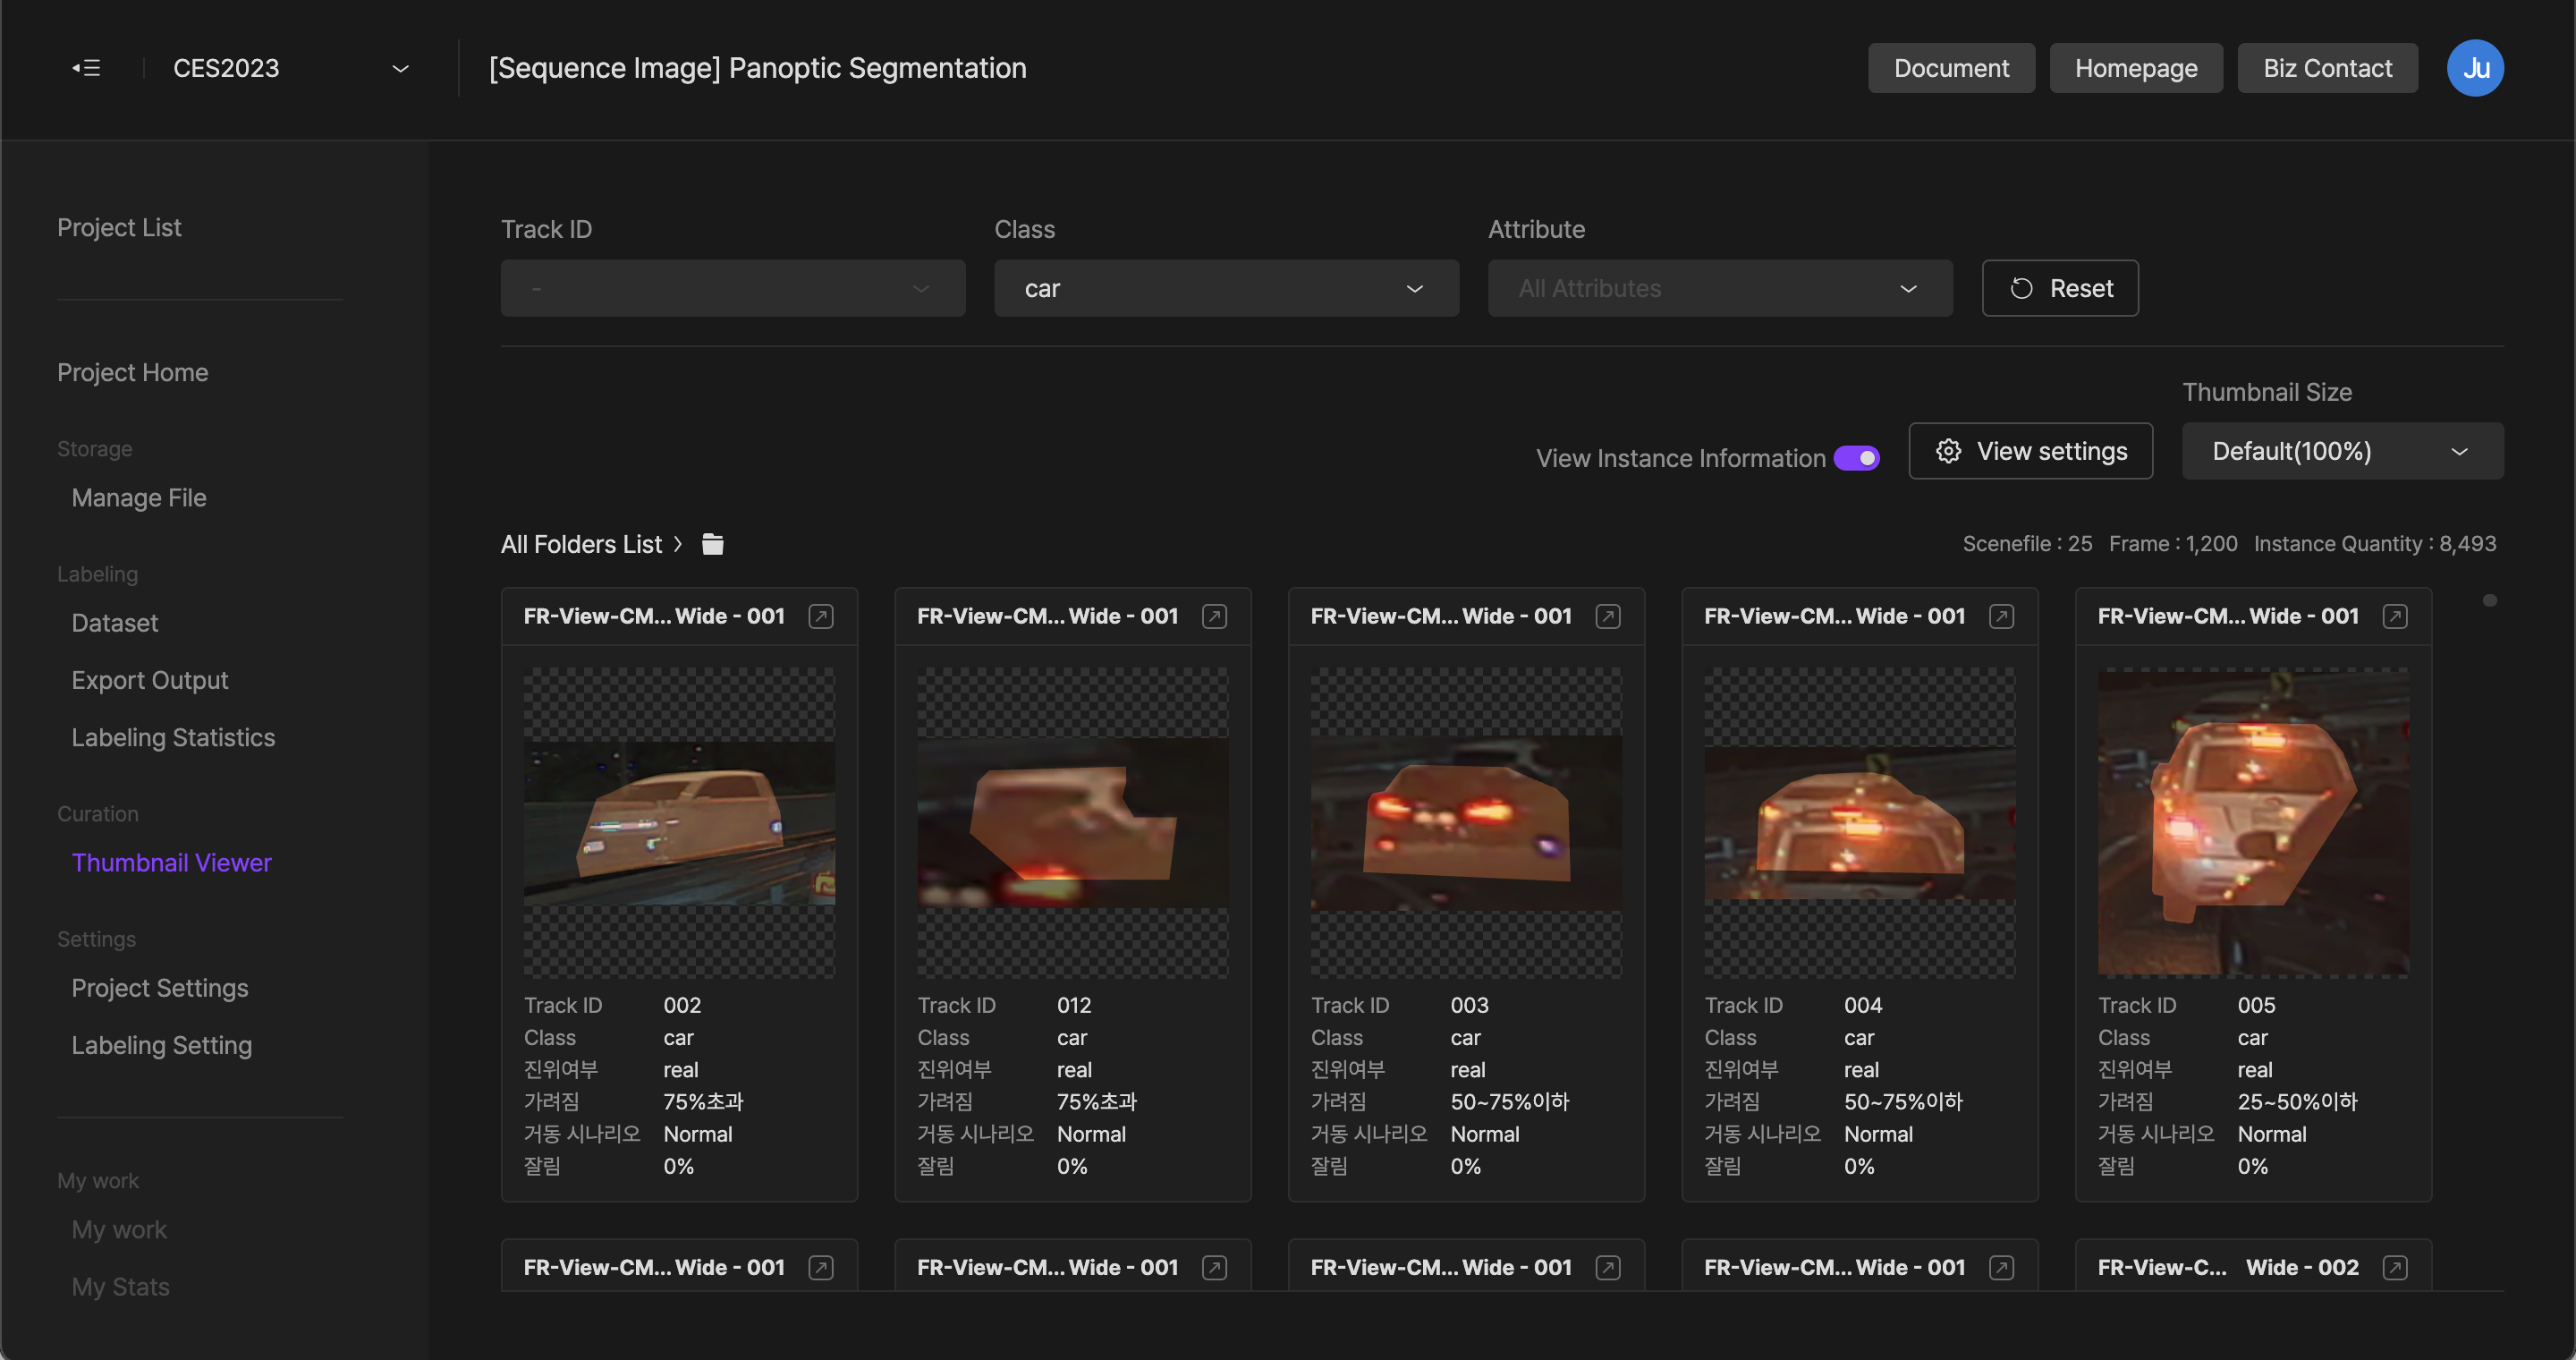
Collect Instances
You can collect thumbnails and labeling information of all instances created in the project.
Target file condition of ‘Collect Instances
- Select the
Collect Instancesbutton in the dataset
: Load folder or file data loaded in the list. Results from the search or filter are reflected. - (Sequence image, 3D Point Cloud type) After selecting a scene file from the file list, select the
Collect Instancesbutton : Load only the data of the selected scene file.
: Activate track ID filter only when a single scene file is selected
If you have any other inquiries, please get in touch with us at [email protected]
Updated about 1 year ago