
Thumbnail Viewer
It is available to collect thumbnails and labeling information of all the instances created in the project.
How to use Thumbnail Viewer
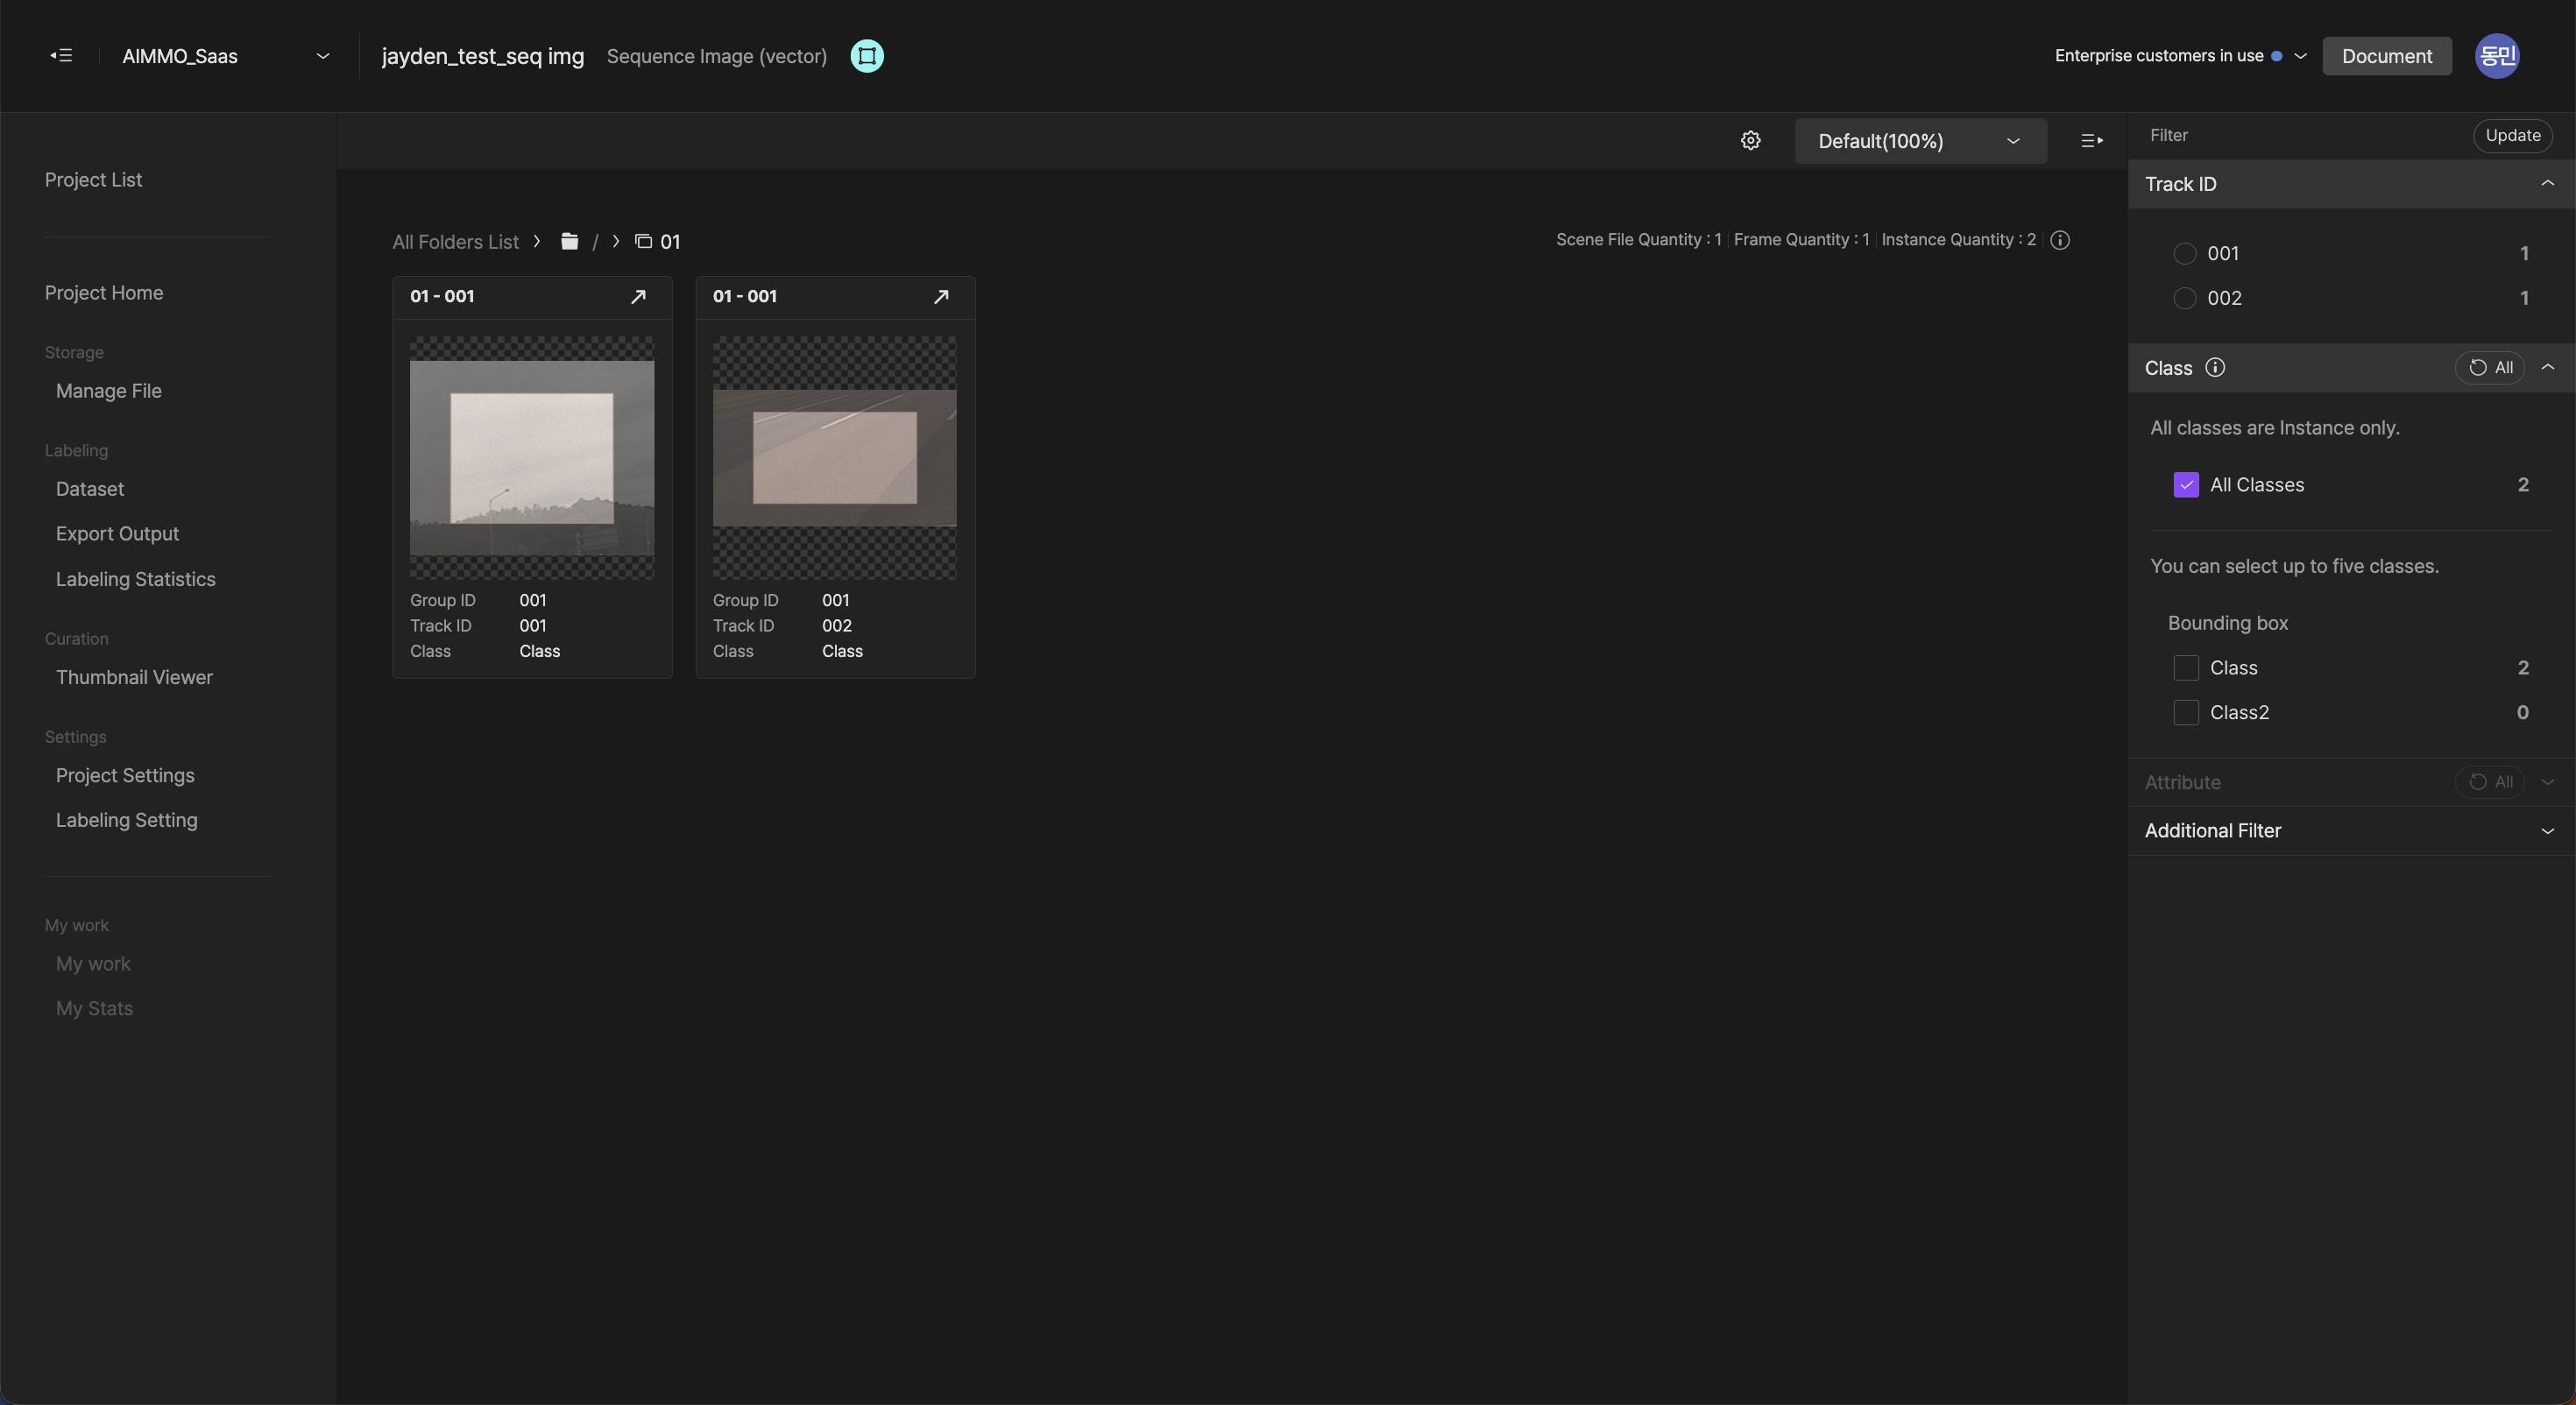
- When selecting the ‘Thumbnail Viewer’ menu from the left menu
Load entire project data. - Select the ‘Thumbnail Viewer’ button in the dataset
Load the folder or file data loaded in the list. Result values from the search or filter will be reflected. - (Sequence Image, 3D Point Cloud Type) Select a scene file from the file list and select the
Thumbnail Viewerbutton
Load only the data from the selected scene file (Activate Track ID Filter only when selecting a single scene file) - (Sequence image, 3D Point Cloud type) Select the
Collect Track IDbutton in the instance card of the scene file created in Studio
Load only the instances that are set to that track ID. (Activate Track ID Filter)
Feature Details
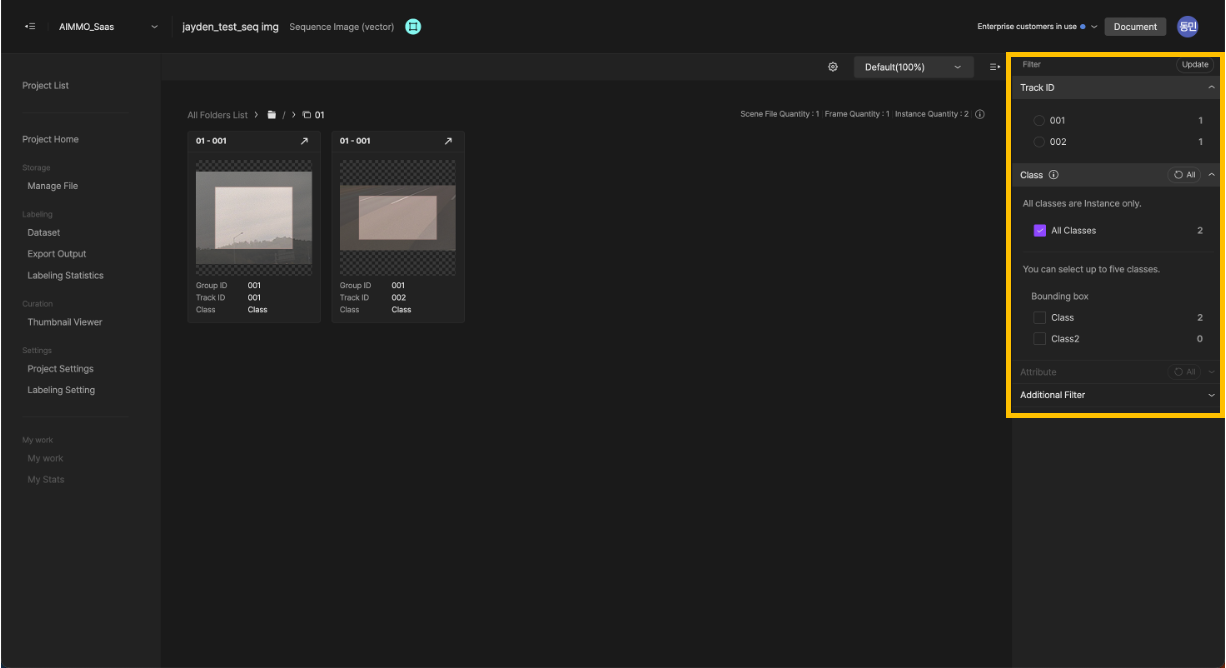
Class, Attribute, and Track ID filters
Users can filter only the instances they want to check. By checking the same classes and attributes collectively, it is possible to speed up the inspection and quickly find incorrect labeling data.
- classes, attribute filters
When filtering, classes support single selection, and attributes support multiple selections. When selecting multiple attributes, only the instances that contain all the selected attribute values are exposed. - Track ID Filter
Instances only in the scene file that are set to the same track ID are exposed. The Track ID filter is only activated when loading 'Thumbnail Viewer' for a single scene file in a dataset or studio. - Extra Filter
Extra filter is supported by work stages and dataset tags. the work stage filter is visible when the folder is selected and all stages except the first will be shown. When setting the extra filter, the information of the quantity by condition per class and attribute will be supported.
View settings
It is available to set visualization for instance thumbnails.
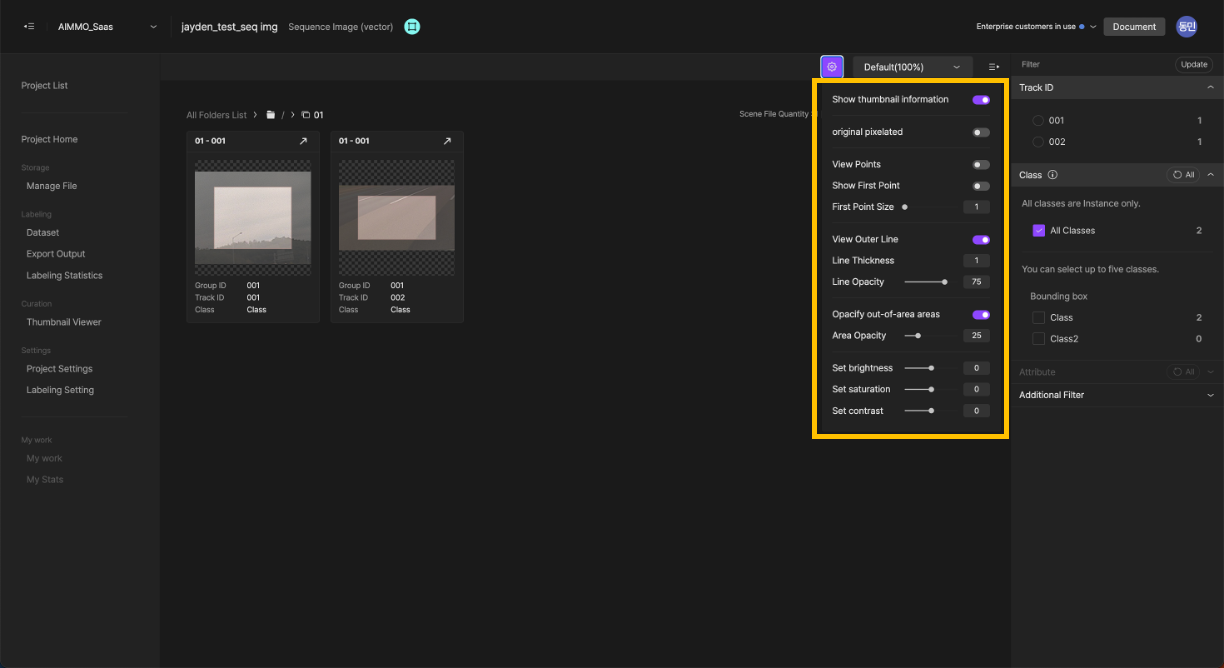
- View Thumbnail info: Viewing the classes and attributes in thumbnails can be either on or off.
- Original pixelation: Change the original file to pixels. The surrounding instances can be more visible to see with the eyes.
- View points: Shows the points of the instance.
- View first point: Shows the first point of the instance.
- First point size: Adjust the first point of the instance.
- View Outline: Shows the outlines of the instance.
- Line Thickness/Line Opacity: It controls the thickness and opacity of the instance's lines.
- Out-of-area opaque: It treats non-instance areas opaque.
- Area opacity: Adjust the opacity of the instance area.
- Brightness/Saturation/Contrast: Adjust the brightness, saturation, and contrast of the thumbnail.
Thumbnail size
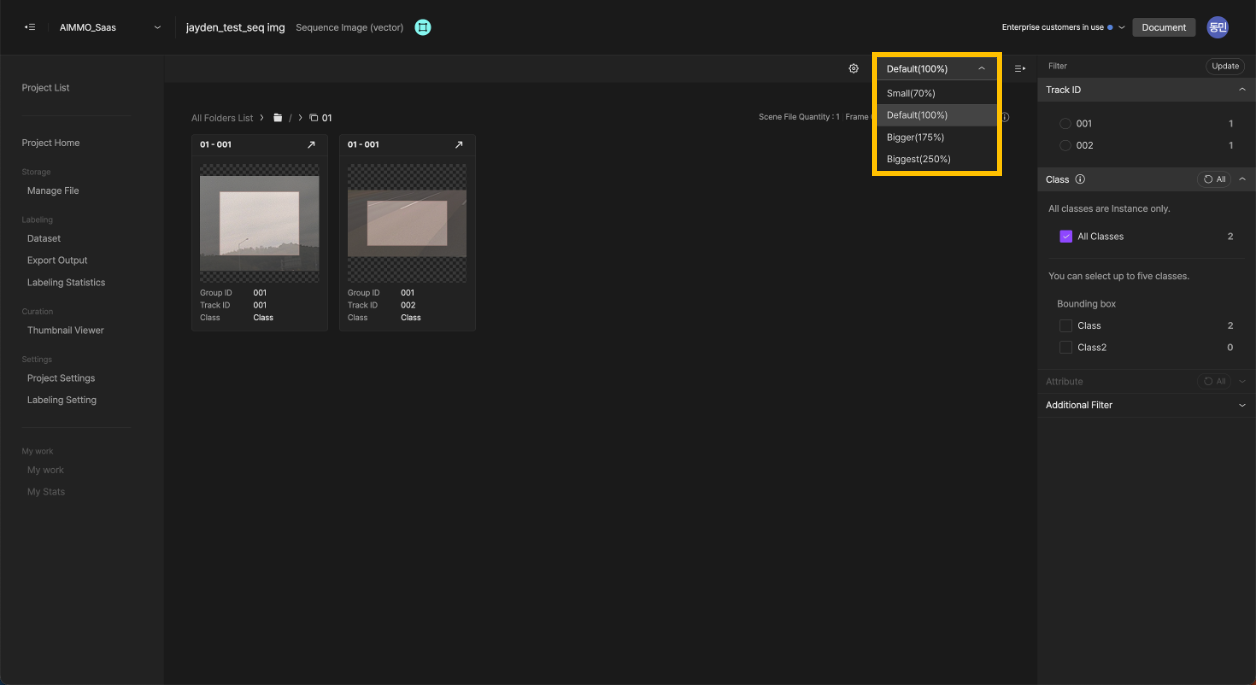
It is available to use thumbnail sizing to suit your purpose. By increasing the thumbnail size, many instances can be inspected on one screen so that you can increase speed and accuracy. When reducing the size, it is possible to inspect more instances at once, which can improve speed.
Open in studio
By choosing the button next to the file name on the instance card, it is possible to open Studio and check what the task content of the file is.
If you have any other inquiries, please get in touch with us at [email protected]
Updated about 1 year ago