
Member
Overview
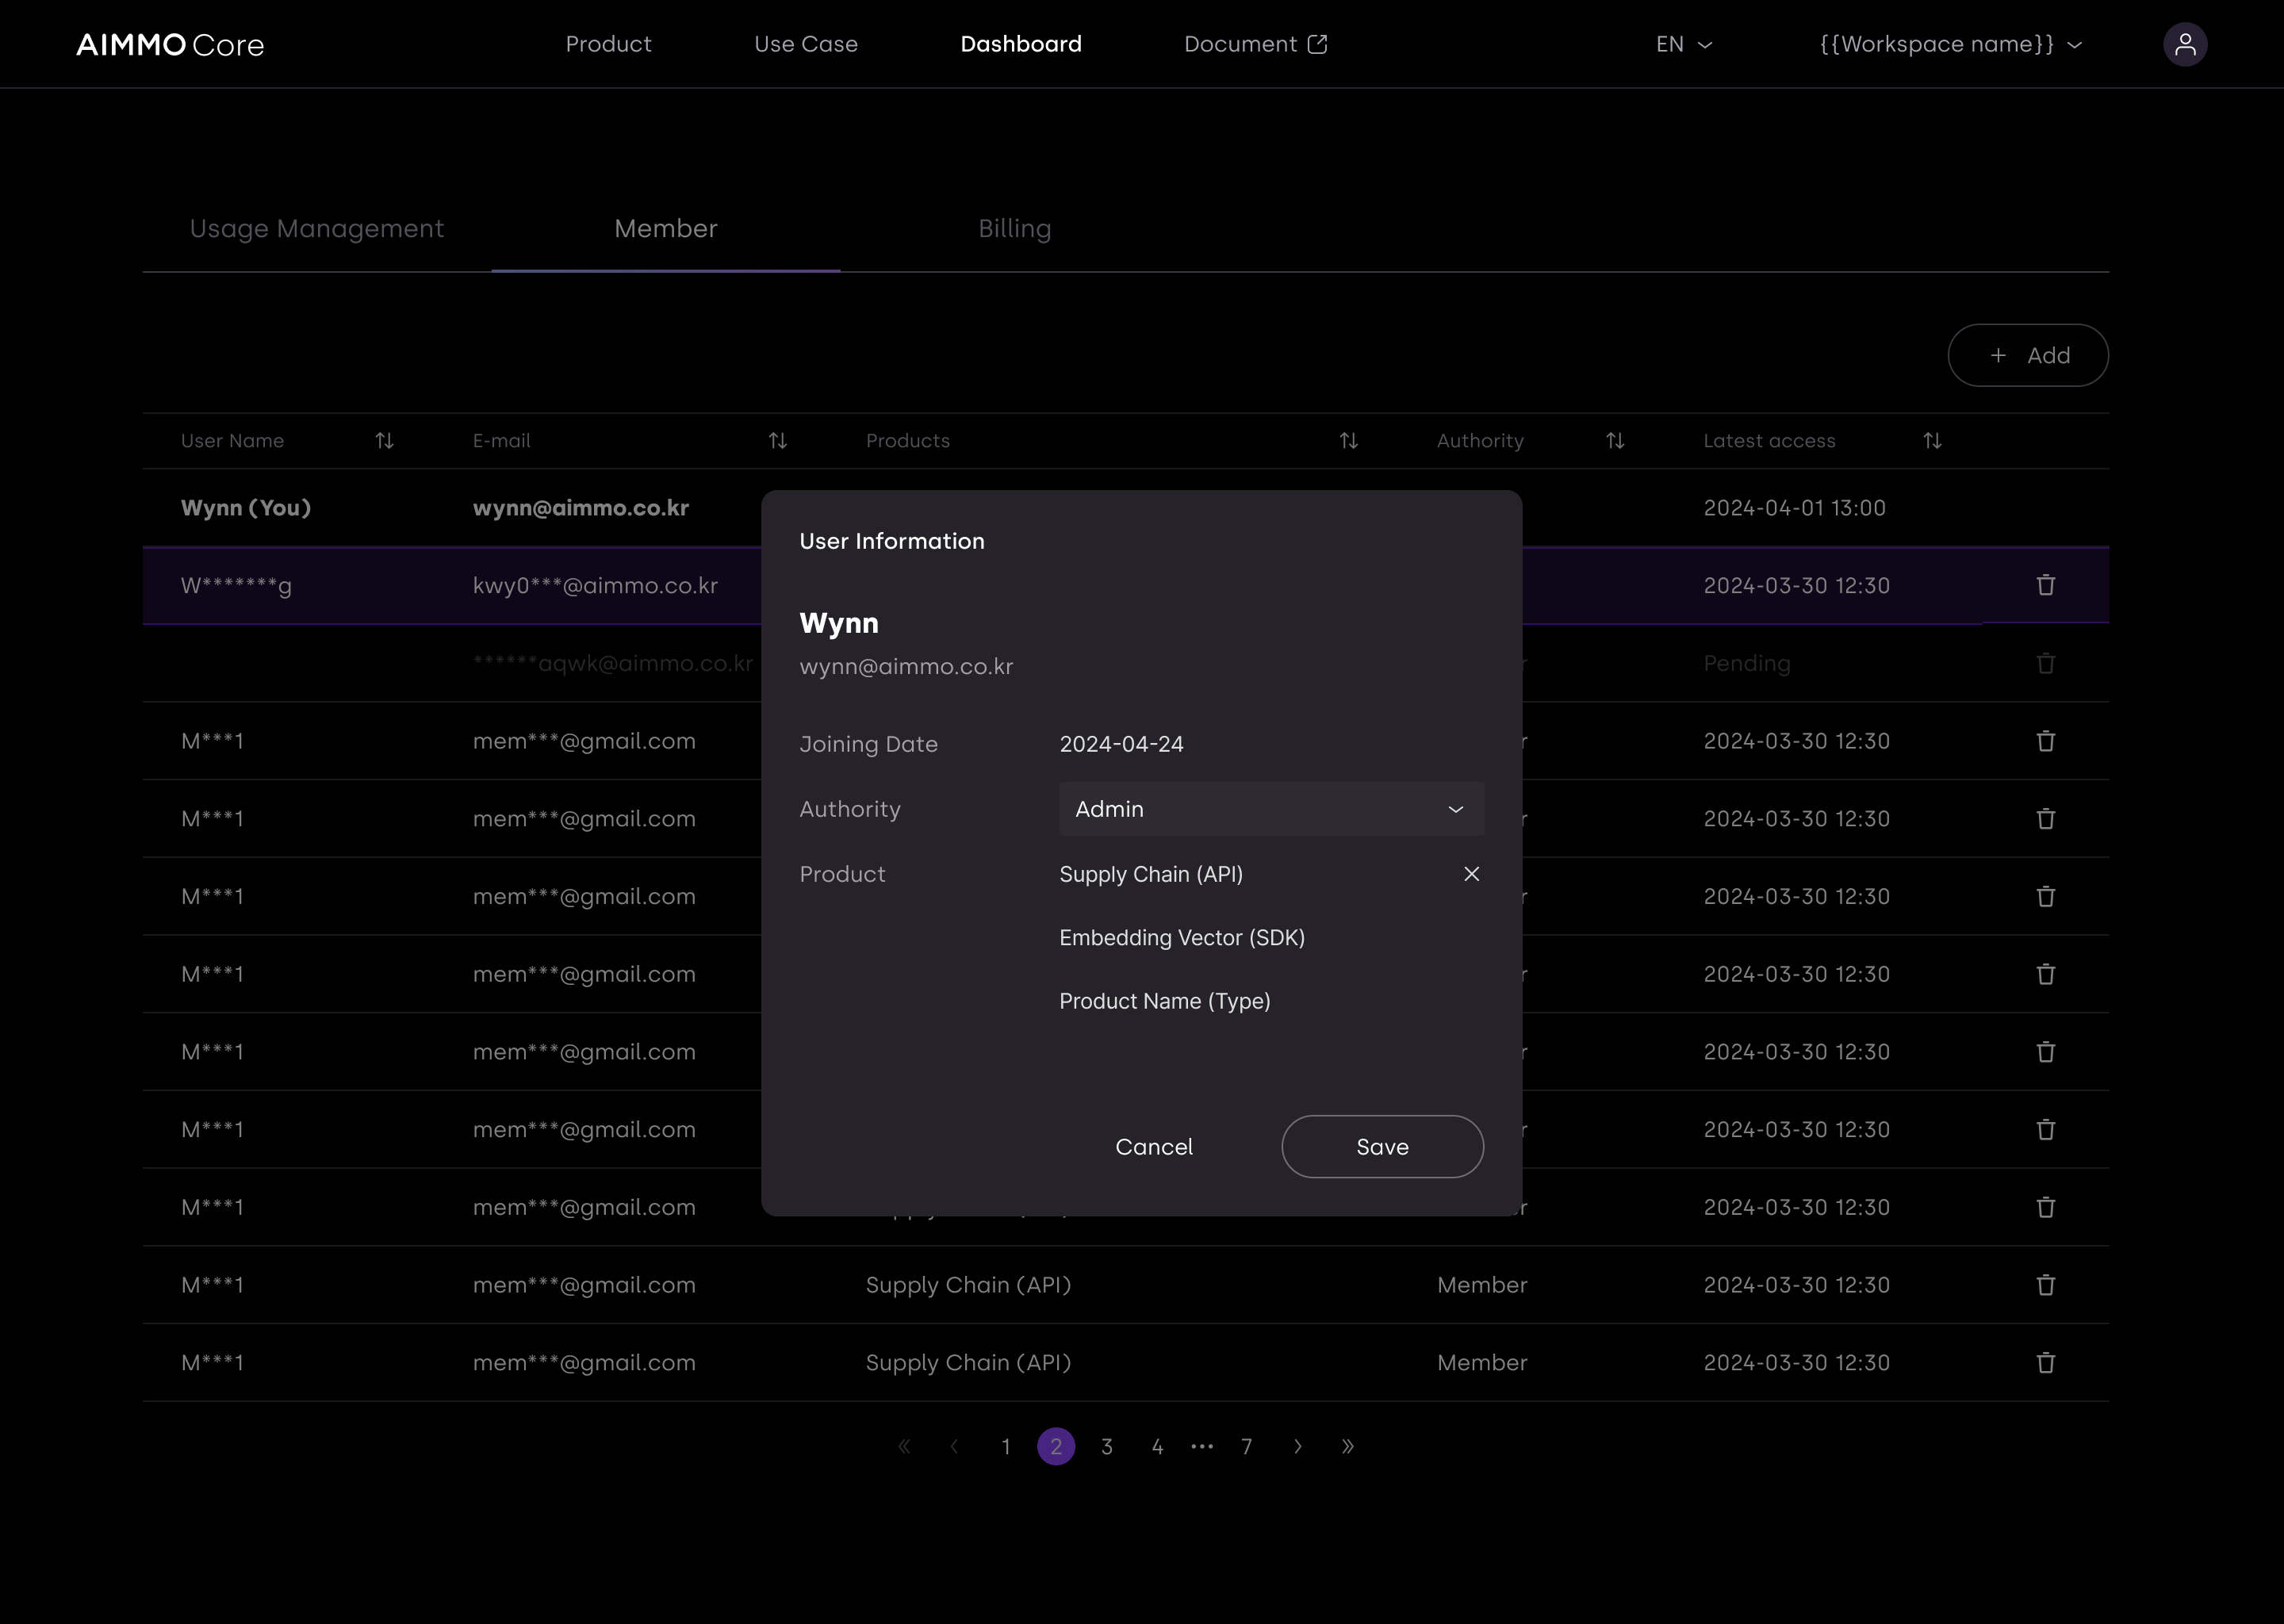
The Member page allows you to view, manage, and edit the permissions of members within your workspace. It provides detailed information about the members associated with your account. Features include adding new members, viewing member details, and managing permissions. Azure subscribers will have limited access to member menu as azure portal has higher member management channel.
Page Sections and Features
-
Member List
- Displays a list of all members within the workspace.
- Columns include:
- User Name: The name of the member. Your own name is marked with "(You)".
- E-mail: The email address of the member.
- Products: The products or services the member has access to.
- Authority: The role or authority level of the member (e.g., Admin, Owner, Member).
- Latest Access: The last time the member accessed the workspace.
- Delete Icon: An icon to remove the member from the workspace.
-
Add Member Button
- Not available for Azure subscribers.
- Located in the top right corner of the page.
- Clicking this button allows you to add a new member to the workspace.
-
Sorting and Navigation
- The columns can be sorted to organize members by name, email, product access, authority, or latest access.
- Pagination controls at the bottom of the list allow you to navigate through multiple pages of members.
Detailed Steps
-
Viewing Member Details
- To view the details of any member, simply look at the relevant row in the member list.
-
Adding a New Member
- Click the "+ Add" button at the top right.
- Enter the new member's details, such as name, email, and set their initial permissions.
- Confirm to add the new member to the workspace.
-
Editing Member Permissions
- Locate the member whose permissions you wish to edit.
- Click on the authority field to change their role (e.g., from Member to Admin).
-
Removing a Member
- Find the member you want to remove from the list.
- Click the trash icon next to their name.
- Confirm the deletion to remove the member from the workspace.
-
Sorting and Navigating
- Click on the column headers to sort members by name, email, products, authority, or latest access.
- Use the pagination controls to move between different pages of the member list.
-
-
Inviting Workspace Members
-
To invite workspace members:
"After clicking the 'Add' button located at the top right, enter the email address of the member you want to invite and set their permissions."
-
Example Use Cases
- Managing Team Access: If you need to update a team member's access level, find their name, and change their authority from 'Member' to 'Admin' or any other appropriate role.
- Adding New Team Members: When a new member joins your team, use the "+ Add" button to quickly add them to your workspace and assign them the necessary permissions.
- Monitoring Activity: Check the 'Latest Access' column to see when each member last accessed the workspace, helping you keep track of active and inactive users.
By following this guide, you can effectively manage your team members and their permissions within your workspace, ensuring everyone has the appropriate access and roles.
Updated about 1 year ago